What Emergency Roof Tarping Actually Does (and Doesn't Do)
Emergency roof tarping is the controlled installation of a heavy-duty waterproof tarp over a damaged section of roof to stop water intrusion. It is a stabilization measure, not a repair. The goal is to redirect water away from the breach and off the roof so that wind-driven rain, snowmelt, and standing water can no longer reach the openings in your roof deck. Done correctly, it can hold for weeks to a few months depending on the tarp material, the quality of the installation, and the weather it has to endure.
It helps to think of tarping the way a paramedic thinks of a tourniquet: it stops the bleeding so the real treatment can happen safely and on a sane timeline. A tarp will not fix rotted decking, replace missing shingles, or restore the watertight integrity of your roofing system. What it does do is prevent the cascade of secondary damage that turns a few hundred dollars of roof repair into many thousands of dollars of interior restoration.
The distinction matters because the most expensive part of a roof leak is rarely the roof itself. It is the drywall, insulation, flooring, framing, and electrical that the water reaches once it gets inside. Mold can begin developing in damp materials within a day or two under the right conditions, and saturated insulation loses its R-value and often has to be removed entirely. Tarping interrupts that chain quickly, which is why it is almost always worth doing the moment a roof is compromised.
- Stops active water intrusion through holes, missing shingles, blow-offs, or impact damage
- Protects the attic, ceilings, insulation, wiring, and your belongings below
- Buys time to dry out the structure, document damage, and schedule a proper repair
- Is temporary by design — typically holds weeks to a couple of months, not indefinitely
- Does not repair the roof or restore long-term waterproofing on its own
When You Need a Tarp Now — and When It Can Wait
Not every roof problem is an emergency, but several clearly are. If you can see daylight through the roof from inside the attic, if a tree limb or debris has penetrated the deck, if a large section of shingles has blown off in a storm, or if water is actively dripping into living space during or after rain, the roof needs to be covered as soon as it is safe to get up there. The faster a breach is sealed, the less interior damage you accumulate.
Timing also depends on what the weather is about to do. A small, slow leak under a clear forecast may give you a day or two to line up help. The same leak with another storm system inbound becomes urgent, because a tarp installed before the next rain prevents damage, while one installed after simply limits it. When in doubt, treat an open roof the way you would treat an open window in a thunderstorm — close it first, ask questions later.
There are also situations where you should not rush onto the roof yourself at all. Active lightning, high wind, ice, snow, or a steep or multi-story roofline can make a DIY attempt far more dangerous than the leak itself. Roofing falls are among the most serious home-maintenance injuries. If conditions are unsafe, the right emergency move is to manage the water inside (buckets, containment, moving valuables) and get a professional crew with proper fall protection on the roof when it is safe.
- Daylight visible through the roof deck or attic
- A tree limb, branch, or debris has punctured the roof
- A large area of shingles blew off in a storm
- Active dripping into ceilings or walls during or after rain
- Another storm is forecast before a permanent repair can happen
- Hold off on DIY in lightning, high wind, ice/snow, or on steep/high roofs — manage water inside and call a pro instead
How Professional Roof Tarping Is Done Right
A proper emergency tarp is engineered, not just thrown over a hole. The first step is assessment: identifying the full extent of the damage, including breaches that are not obvious from the ground, and checking the surrounding decking so the tarp covers sound material on every side of the opening. A tarp that ends in the middle of a damaged area will leak; it has to bridge well past the breach onto intact roof.
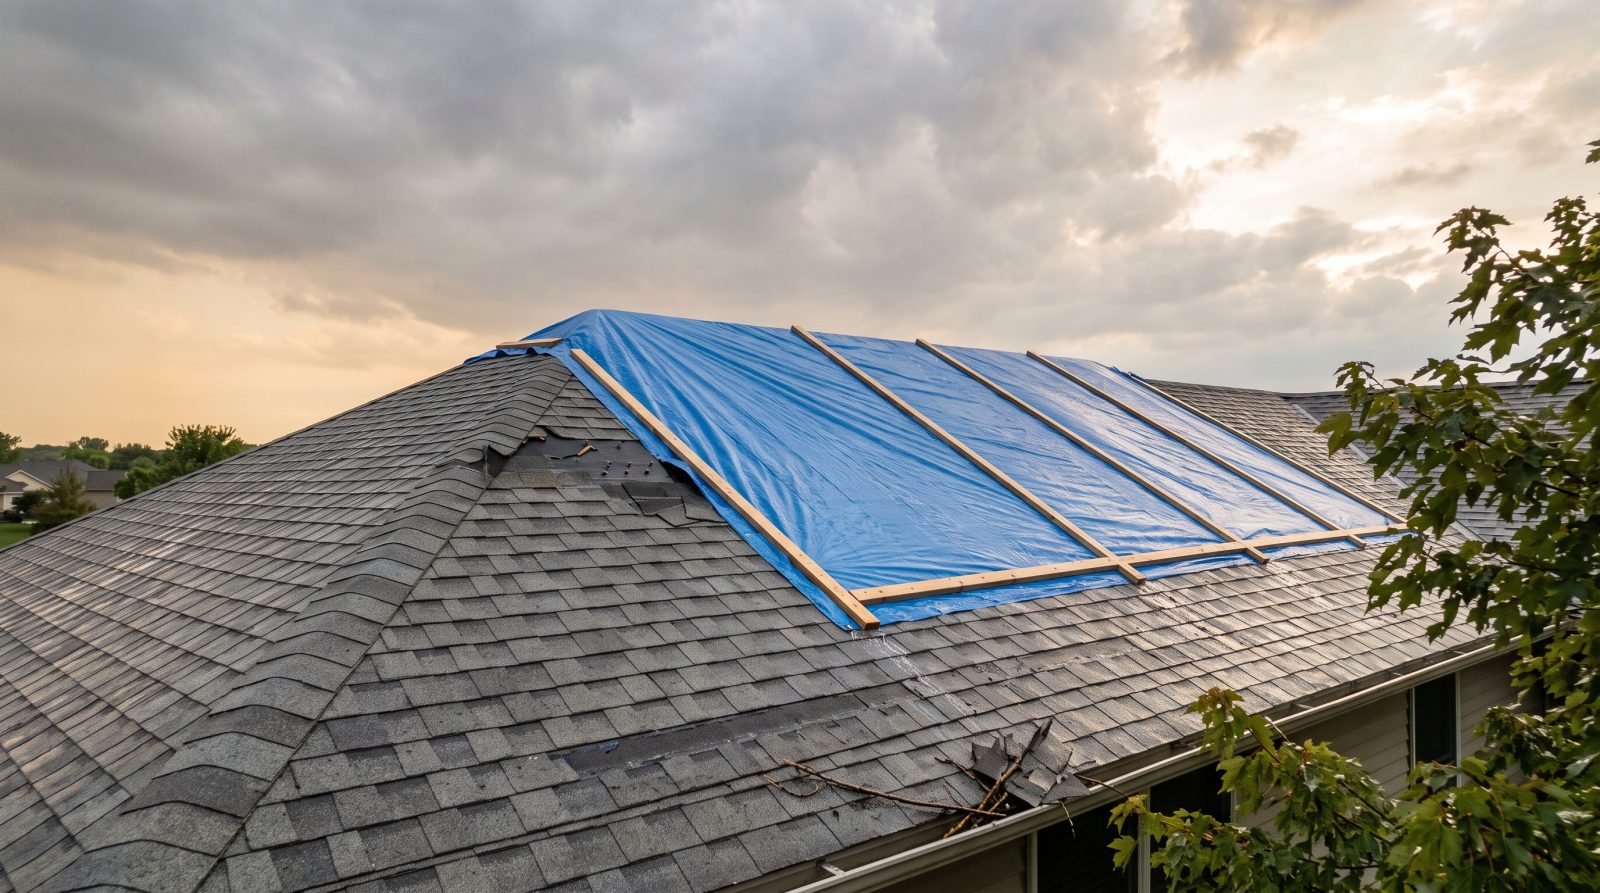
The tarp is then run from the ridge (peak) downward so that the top edge is higher up the slope than the damage. This orientation lets gravity carry water over the tarp and off the roof rather than under it. The leading edge is typically wrapped around a length of furring strip or board and anchored at the ridge so wind cannot get beneath it and balloon it loose, which is the most common reason amateur tarps fail in the next windstorm. Edges and fasteners are sealed and positioned to shed water, not trap it.
Fastening technique matters enormously. Anchoring boards distribute load and reduce the number of penetrations through good roofing, and fasteners should be placed and sealed so they do not become new leak points. A flapping, under-secured tarp can do additional damage by abrading shingles and tearing in wind. Professionals also factor in slope, roofing material, and the weather window — a tarp on a low-slope or flat roof, a tile roof, or a metal roof each calls for a different approach than standard asphalt shingles.
Materials are part of getting it right too. Lightweight blue poly tarps from a hardware store can work for a very short-term, small cover, but they degrade quickly in UV and tear in high wind. Heavier reinforced poly or purpose-made roofing tarps last considerably longer. Because climates differ across the country — intense sun in the Southwest, heavy snow load in the North, hurricane-force wind along the coasts, and frequent thunderstorms in much of the central and southern U.S. — the right material and anchoring for your region and roof is something a professional can match to your situation.
- Assess the full extent of damage, including hidden breaches and the surrounding deck
- Size the tarp to bridge well past the damage onto sound roofing on all sides
- Run the tarp from the ridge down so water sheds over it, not under it
- Anchor the top edge (often wrapped on a board) at the ridge against wind uplift
- Seal and position fasteners so they shed water and don't create new leaks
- Match material and method to slope, roof type, and regional weather
DIY Tarping vs. Calling a Pro
A confident, able homeowner can sometimes handle a small, low-slope, single-story tarp in calm weather, and doing so quickly can genuinely save your home from worse damage. If you go this route, the non-negotiables are safety and dry conditions: never work on a wet, icy, or steep roof, never work alone, use a stable ladder and proper footwear, stay clear of power lines, and stop immediately if weather turns. Cover well past the damage, run the tarp over the ridge, and secure the top edge so wind cannot get under it.
That said, there are good reasons most people call a professional even for a temporary fix. A pro brings fall-protection equipment, knows how to anchor a tarp so it survives the next storm rather than peeling off, can spot damage you would miss, and can document the condition properly for an insurance claim. A tarp that fails after the homeowner thought the problem was handled often results in more interior damage than if it had been done correctly the first time.
The decision usually comes down to four factors: how steep and high your roof is, what the weather is doing, how large and complex the damage is, and your own comfort working at height. A small blow-off on a ranch home in clear weather is a different proposition than a tree through the second story with rain on the way. When the situation tips toward steep, high, large, or stormy, professional tarping is the safer and often cheaper choice once you account for the cost of getting it wrong.
- DIY can make sense for small, low, simple damage in dry, calm weather — with a helper and proper safety gear
- Call a pro for steep or multi-story roofs, large or complex damage, or any approaching weather
- Professionals bring fall protection, durable anchoring, damage detection, and claim documentation
- A failed DIY tarp can cost more in interior damage than hiring out the temporary fix
- Be honest about your comfort at height — no leak is worth a fall
What Emergency Roof Tarping Typically Costs
Emergency tarping is generally one of the more affordable steps in the roof-repair process, especially measured against the interior damage it prevents. As a rough, typical industry range, professional emergency tarping often falls somewhere in the low hundreds to around a thousand dollars or more, depending on the specifics. These are estimates that vary widely and are not a quote — the only way to know your number is an assessment of your actual roof.
Several factors move the price within that range. The size of the damaged area and how much tarp and anchoring it takes is the biggest driver. Roof height, steepness, and access difficulty matter because they affect labor, equipment, and safety setup. The roof type (asphalt shingle versus tile, metal, or flat) changes the method. And timing plays a role — after a major regional storm event, demand for emergency crews spikes and turnaround can be tighter everywhere.
It is worth weighing this cost against what tarping protects. A few hundred dollars to seal a roof can prevent thousands in drywall, insulation, flooring, framing, and mold remediation, plus the disruption of living in a damaged home. Many homeowners also find that prompt, professional tarping strengthens an insurance claim, because most policies expect you to take reasonable steps to prevent further damage after a covered event — more on that below.
- Typical industry range: roughly low hundreds up to around a thousand dollars or more — an estimate that varies, not a quote
- Main cost drivers: damage size, roof height/steepness/access, roof type, and material used
- Post-storm demand surges can affect availability and timing
- Often far cheaper than the interior damage it prevents
- Get a free roof assessment for your actual numbers — call (669) 259-2777
After the Tarp: Insurance, Documentation, and Permanent Repairs
A tarp is the start of the process, not the end. The next priorities are protecting your insurance claim and getting the permanent repair scheduled before the temporary cover starts to fail. Most homeowner policies include a duty to mitigate, meaning you are expected to take reasonable steps to prevent further damage after a covered loss. Tarping satisfies that expectation, but you have to be able to show it.
Before and during the emergency, document everything you safely can. Take clear photos and video of the damage and the interior water intrusion, keep receipts for tarps, materials, or emergency service, and note the date and the weather event that caused the damage. If you file a claim, this record helps establish both the cause and the steps you took, which tends to make the process smoother. Avoid throwing away damaged materials your adjuster may want to see until you have confirmation it is fine to do so.
Then plan the permanent repair on a realistic clock. A good tarp buys you time, but it is still temporary — UV, wind, snow load, and pooling water all work against it. The longer it stays up, the higher the chance it begins to leak again, so it is wise to get a professional roof inspection and a repair scope underway rather than treating the tarp as a long-term solution. A thorough inspection also catches damage that was not obvious in the emergency, so the permanent fix addresses the whole problem and not just the visible hole.
Roof Repairs provides nationwide roofing help for homeowners and businesses, from emergency tarping through the permanent repair. If your roof is compromised or you want a damaged roof inspected and a clear plan put in front of you, call (669) 259-2777 for a free roof assessment and quote.
- Know your policy's duty to mitigate — tarping helps show you acted to limit damage
- Document with photos, video, receipts, and the date and cause of the damage
- Keep damaged materials until your adjuster confirms you can discard them
- Treat the tarp as a clock, not a solution — schedule the permanent repair promptly
- Get a full inspection so the permanent fix addresses hidden damage too