When a Roof Needs Replacement vs. Repair
Before any replacement begins, the most important decision is whether you actually need a full replacement at all. A roof is a system, not a single surface, and many problems that look catastrophic from the ground are repairable. The honest answer depends on three things: the age of the roof relative to its expected lifespan, the percentage of the surface that has failed, and whether the underlying structure (the decking and framing) is still sound.
Material matters a great deal here, and it varies by region and climate. A standard asphalt shingle roof typically lasts roughly 15 to 30 years depending on quality and exposure, while architectural shingles can run longer. Metal roofing often lasts 40 to 70 years, and tile or slate can last far longer still but is heavy and brittle to walk on. In hot, high-UV regions like the Southwest, shingles age faster from sun; in the Northeast and Midwest, freeze-thaw cycles and ice dams drive failure; along the Gulf and coastal South, wind uplift and humidity are the bigger enemies. A roof that is near the end of its rated life and showing widespread wear is usually a better candidate for replacement than repair.
As a general rule, if damage is localized, the roof is well within its lifespan, and the deck is dry and solid, a repair is often the smarter spend. If the roof is aging, leaks are appearing in multiple places, or a contractor finds soft or rotted decking, replacement protects you better over the long run.
- Signs that point toward replacement: widespread curling, cupping, or cracked shingles; granules filling the gutters; multiple active leaks; sagging rooflines; daylight visible through the attic deck.
- Signs that often allow repair: a single damaged section, a few wind-blown shingles, isolated flashing failure on an otherwise healthy roof.
- A trustworthy assessment looks in the attic, not just on the surface, because moisture, rot, and ventilation problems show up underneath first.
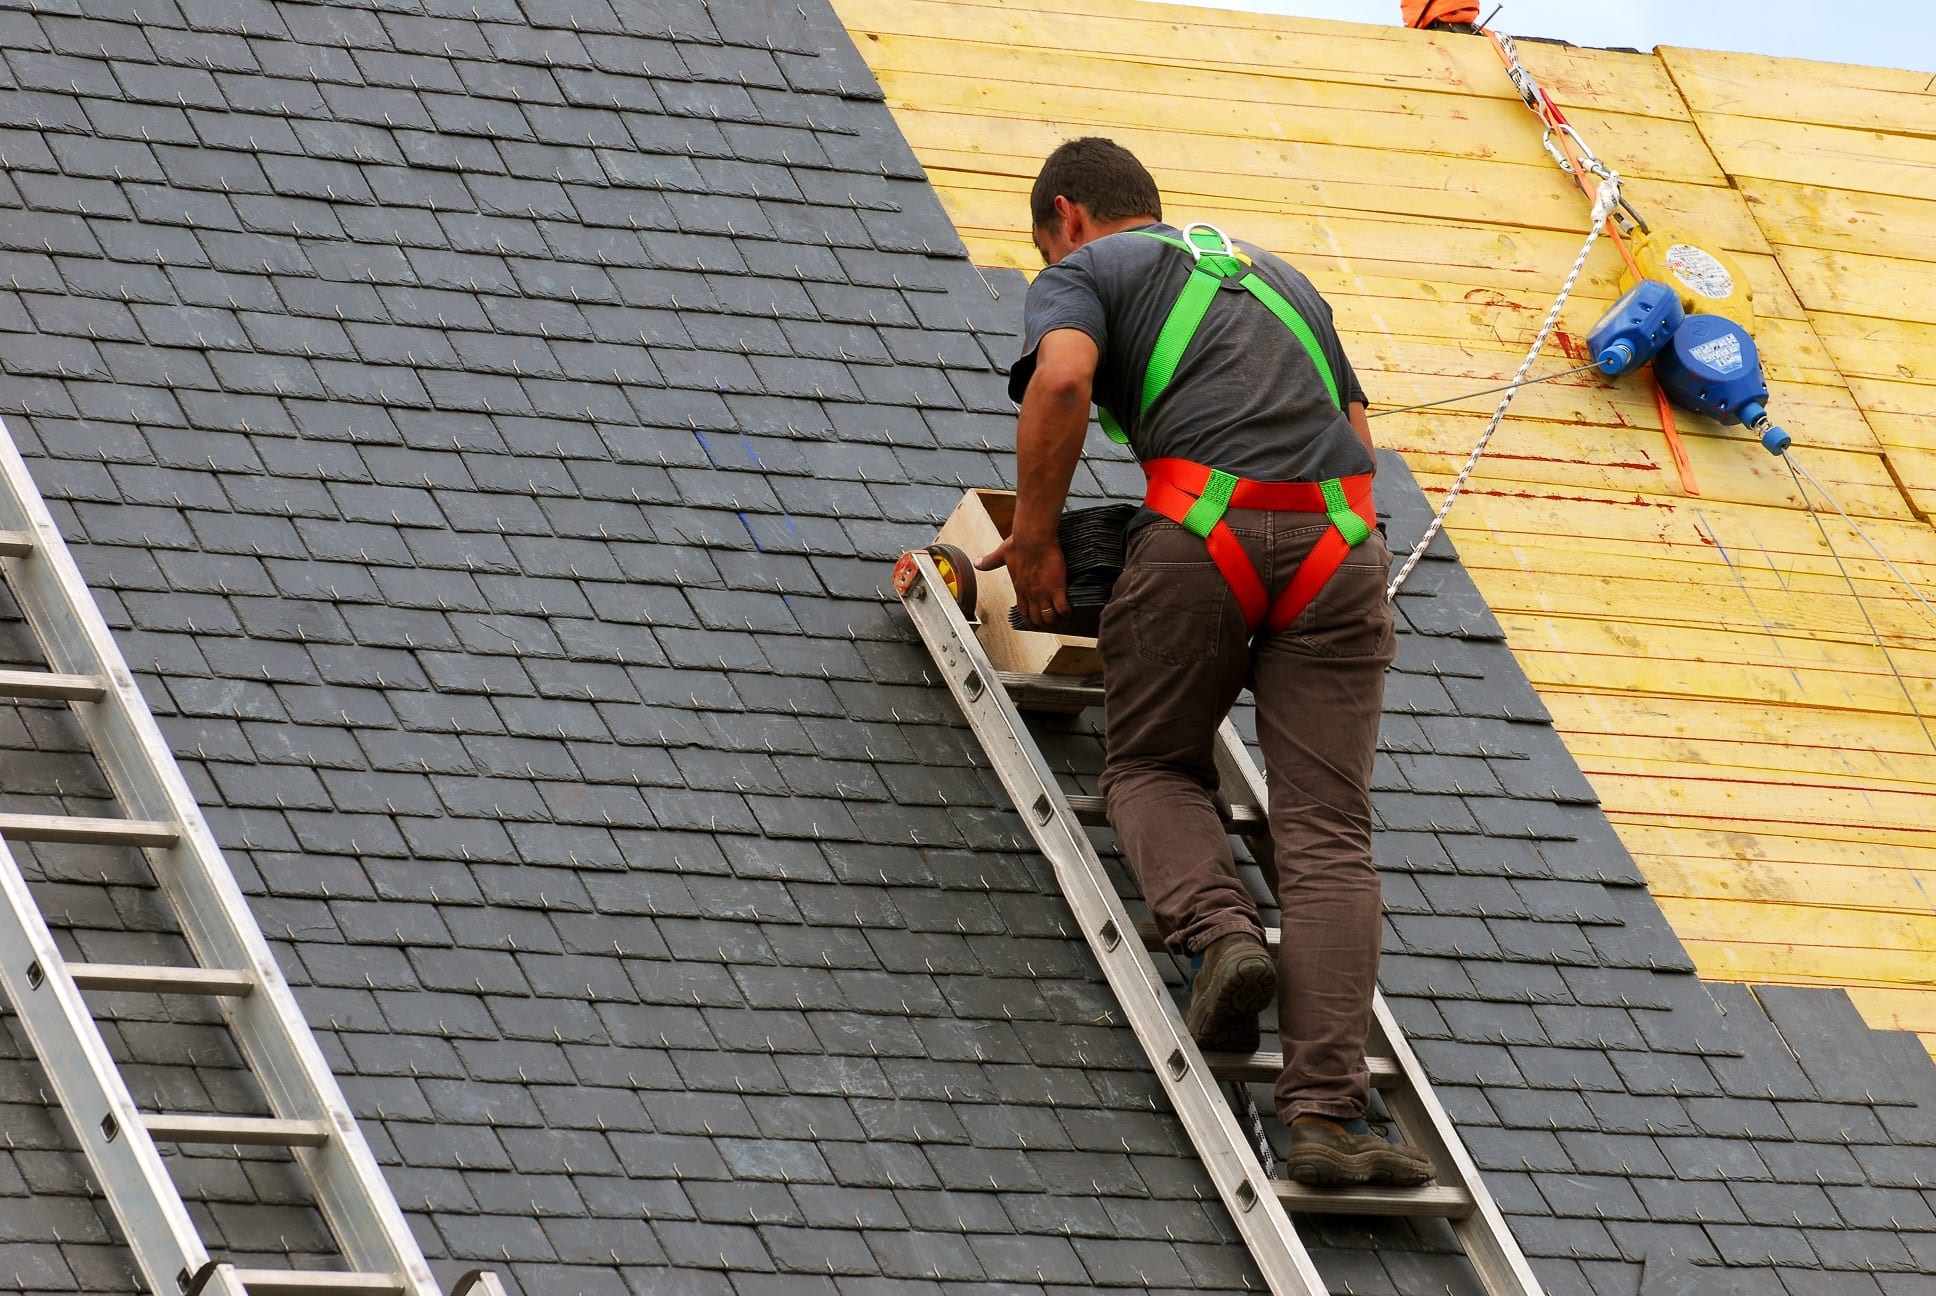
Step 1 - Inspection, Measurement, and the Estimate
A proper replacement starts with a thorough inspection, both on the roof and inside the attic. A good roofing professional measures the roof in squares (one square equals 100 square feet), counts the facets, hips, valleys, and penetrations, and notes the pitch (steepness). These details drive both the material quantity and the labor difficulty: a steep, complex roof with many valleys and skylights takes far more time and material than a simple gable roof of the same square footage.
The inspection also examines the components that are easy to overlook but critical to a lasting roof: the condition of the decking, the flashing around chimneys and walls, the ventilation system, and the gutters. The estimate you receive should itemize these rather than just quote a single lump sum. Expect line items for tear-off and disposal, decking repair allowances, underlayment, the roofing material itself, flashing and accessories, ventilation, and cleanup.
On cost: roof replacement pricing varies widely, so the figures below are typical industry ranges that change from job to job. As a broad national reference, asphalt shingle replacement commonly falls somewhere in the range of roughly $4 to $9 per square foot installed, while metal, tile, and slate run considerably higher. The final figure depends on region, labor rates, material choice, roof size, pitch, complexity, and how much decking needs replacing. The only way to get a real number for your roof is an on-site assessment.
- What a quality estimate should specify: material brand and product line, underlayment type, number of decking sheets included before extra charges apply, flashing scope, and warranty terms.
- Ask how unforeseen decking damage is handled and priced, since it is the most common source of change orders once tear-off begins.
- Permits and local code compliance are part of the process in most jurisdictions and should be addressed up front.
Step 2 - Preparation and Protecting the Property
On the day work begins, a professional crew spends real time protecting your property before a single shingle comes off. Tear-off is messy: thousands of nails, shingle fragments, and debris will come down. Crews lay tarps and plywood along the ground, cover landscaping and AC units, and often protect siding and windows. Inside, attic contents directly under the roof can be covered too, since vibration from tear-off can shake loose dust and old debris.
Preparation also includes staging materials safely, setting up a debris container or dump trailer positioned to minimize damage to the driveway, and planning crew access. For occupied homes and businesses, a good crew will talk through where vehicles should be parked, how children and pets will be kept clear of the work zone, and roughly what hours to expect noise. This stage sets the tone for a clean, safe job and is a fair early signal of how a contractor operates.
- Move vehicles out of the driveway and away from the work zone the night before.
- Expect debris protection over landscaping, decks, pools, and HVAC equipment.
- Remove or secure fragile wall-hung items in the attic and top floor, since tear-off causes vibration.
Step 3 - Tear-Off and Decking Inspection
Tear-off is the removal of the old roofing down to the wood decking. While it is sometimes possible to install new shingles over a single existing layer, a full tear-off is the gold standard because it is the only way to actually see and repair the deck beneath. Roofing over old material hides problems, adds weight, and usually voids manufacturer warranties. A complete tear-off lets the crew start from a clean, sound surface.
Once the deck is exposed, this is the make-or-break inspection of the entire project. The crew checks every sheet of decking for rot, water damage, delamination, and soft spots, and confirms it is properly fastened. Any compromised decking must be replaced, because no roofing material can perform over a failing substrate. This is also when hidden issues from old leaks, prior bad repairs, or inadequate ventilation finally come to light. It is also the stage where the earlier conversation about how decking replacement is priced becomes real, since the actual amount of damaged wood is now visible.
- Decking (also called sheathing) is typically plywood or OSB; damaged sheets are cut out and replaced with matching-thickness material.
- Tear-off down to the deck is what allows the new roof to be built correctly, rather than masking old problems.
- A reputable crew shows you any rotted decking they find before replacing it, so you understand the change.
Step 4 - Building the New Roof System Layer by Layer
A modern roof is a layered system, and each layer has a job. The visible shingles or panels are only the outermost piece; what is underneath determines how well the roof sheds water and how long it lasts. Installation proceeds from the bottom up and from the eaves toward the ridge, so that every higher layer overlaps the one below and water always flows over a seam rather than into it.
The first protective layer at the vulnerable edges and valleys is an ice-and-water shield, a self-adhering waterproof membrane. In cold climates this is essential at the eaves to defend against ice dams; everywhere it is used in valleys and around penetrations where water concentrates. Over the rest of the deck goes underlayment, the secondary water barrier beneath the shingles, today most often a synthetic material that resists tearing and holds up better than traditional felt.
Flashing is the unsung hero of a roof. Metal flashing seals the transitions where the roof meets chimneys, walls, skylights, vent pipes, and valleys, directing water back onto the surface instead of into the home. The vast majority of roof leaks originate at flashing, not in the field of the shingles, which is why proper flashing installation, often with new flashing rather than reused pieces, is worth paying attention to. Finally the roofing material itself is installed in the correct nailing pattern specified by the manufacturer, followed by hip and ridge caps.
- Ice-and-water shield: waterproof membrane at eaves, valleys, and penetrations where leaks concentrate.
- Underlayment: the secondary moisture barrier across the deck; synthetic is the common modern choice.
- Flashing: metal sealing at all transitions and penetrations, the number-one place leaks start.
- Ventilation: ridge vents and intake at the eaves keep the attic from overheating and trapping moisture, which protects both the roof and the home.
- Field material and ridge caps: installed with manufacturer-specified fasteners and patterns so the warranty holds and wind resistance is met.
Step 5 - Cleanup, Final Inspection, and Warranty
A roof is not finished when the last shingle is nailed. A professional job ends with a meticulous cleanup, because tear-off scatters nails everywhere. Crews typically run magnetic rollers across the lawn, driveway, and surrounding areas to collect loose fasteners, clear gutters of debris, and haul away all old material. For homes with children, pets, or bare feet in the yard, this step is not cosmetic, it is a safety issue.
The final inspection is your opportunity to confirm the work meets standard. A good contractor walks the property with you, points out the new flashing and ventilation, confirms the cleanup, and addresses any concerns before considering the job complete. In many areas a permit also requires a municipal inspection, which provides an independent check that the work meets code.
Two kinds of warranty typically apply, and it is worth understanding the difference. The manufacturer warranty covers defects in the roofing material itself, while the workmanship warranty covers how the roof was installed. Material warranties are only valid when the product is installed to specification, which is one more reason every earlier step matters. Keep your paperwork, including the estimate, permit, product information, and warranty documents, in one place for the life of the roof.
- Magnetic nail sweep of the yard, driveway, and walkways; gutters cleared; all debris removed.
- Walkthrough with the contractor to confirm flashing, ventilation, ridge caps, and cleanup.
- Save documentation: estimate, permit and inspection record, product data, and both manufacturer and workmanship warranties.
How Long It Takes and What to Expect as a Homeowner
Most residential roof replacements are completed in a matter of days, not weeks. A straightforward asphalt shingle roof on an average single-family home is often finished in one to three days of active work, weather permitting. Larger homes, steeper or more complex roofs, heavier materials like tile or slate, and extensive decking repairs all extend the timeline. Commercial and larger properties naturally take longer and may be phased.
Weather is the single biggest variable. Roofers will not install over wet decking or in conditions that compromise adhesion and safety, so rain, high wind, or extreme cold can pause a project. A good contractor plans for this, keeps the roof dried-in and protected at the end of each day, and communicates clearly if the schedule shifts. Expect noise and vibration throughout the day; it is genuinely loud inside the home while work is overhead.
Across the country, the fundamentals of the process are the same, but the details flex with climate and code. Cold-climate roofs lean harder on ice-and-water protection and ventilation against ice dams; hot-climate roofs prioritize UV-resistant materials and attic heat management; high-wind and coastal regions follow stricter fastening and uplift standards. Wherever you are, the goal is identical: a fully sealed, properly ventilated, code-compliant system built on a sound deck. If you want a clear, no-pressure read on whether your roof needs repair or replacement, Roof Repairs provides nationwide roofing help and free roof assessments. Call (669) 259-2777 to schedule yours.
- Typical active work: roughly one to three days for a standard shingle roof; longer for large, steep, or specialty roofs.
- Weather can pause work; a quality crew keeps the roof protected and dried-in overnight.
- Plan for significant noise and vibration inside the home while the crew is working.